Months ago I followed in the footsteps of Robert Sirchia as he blogged about setting up a Kubernetes cluster on Raspberry Pi devices.
I thought I’d retrace my steps in that journey, including things I’ve done and learned recently.
My goal was (and is) to
- Learn about Kubernetes clusters
- Have a cluster to use that doesn’t cost US$150-$200/month to run
- Be able to run useful workloads like pi-hole, mssql, rabbitmq, postgresql, and more
This cluster meets those needs very nicely.
Building the Physical Cluster
Here’s a photo of the original cluster build based on Robert’s template.
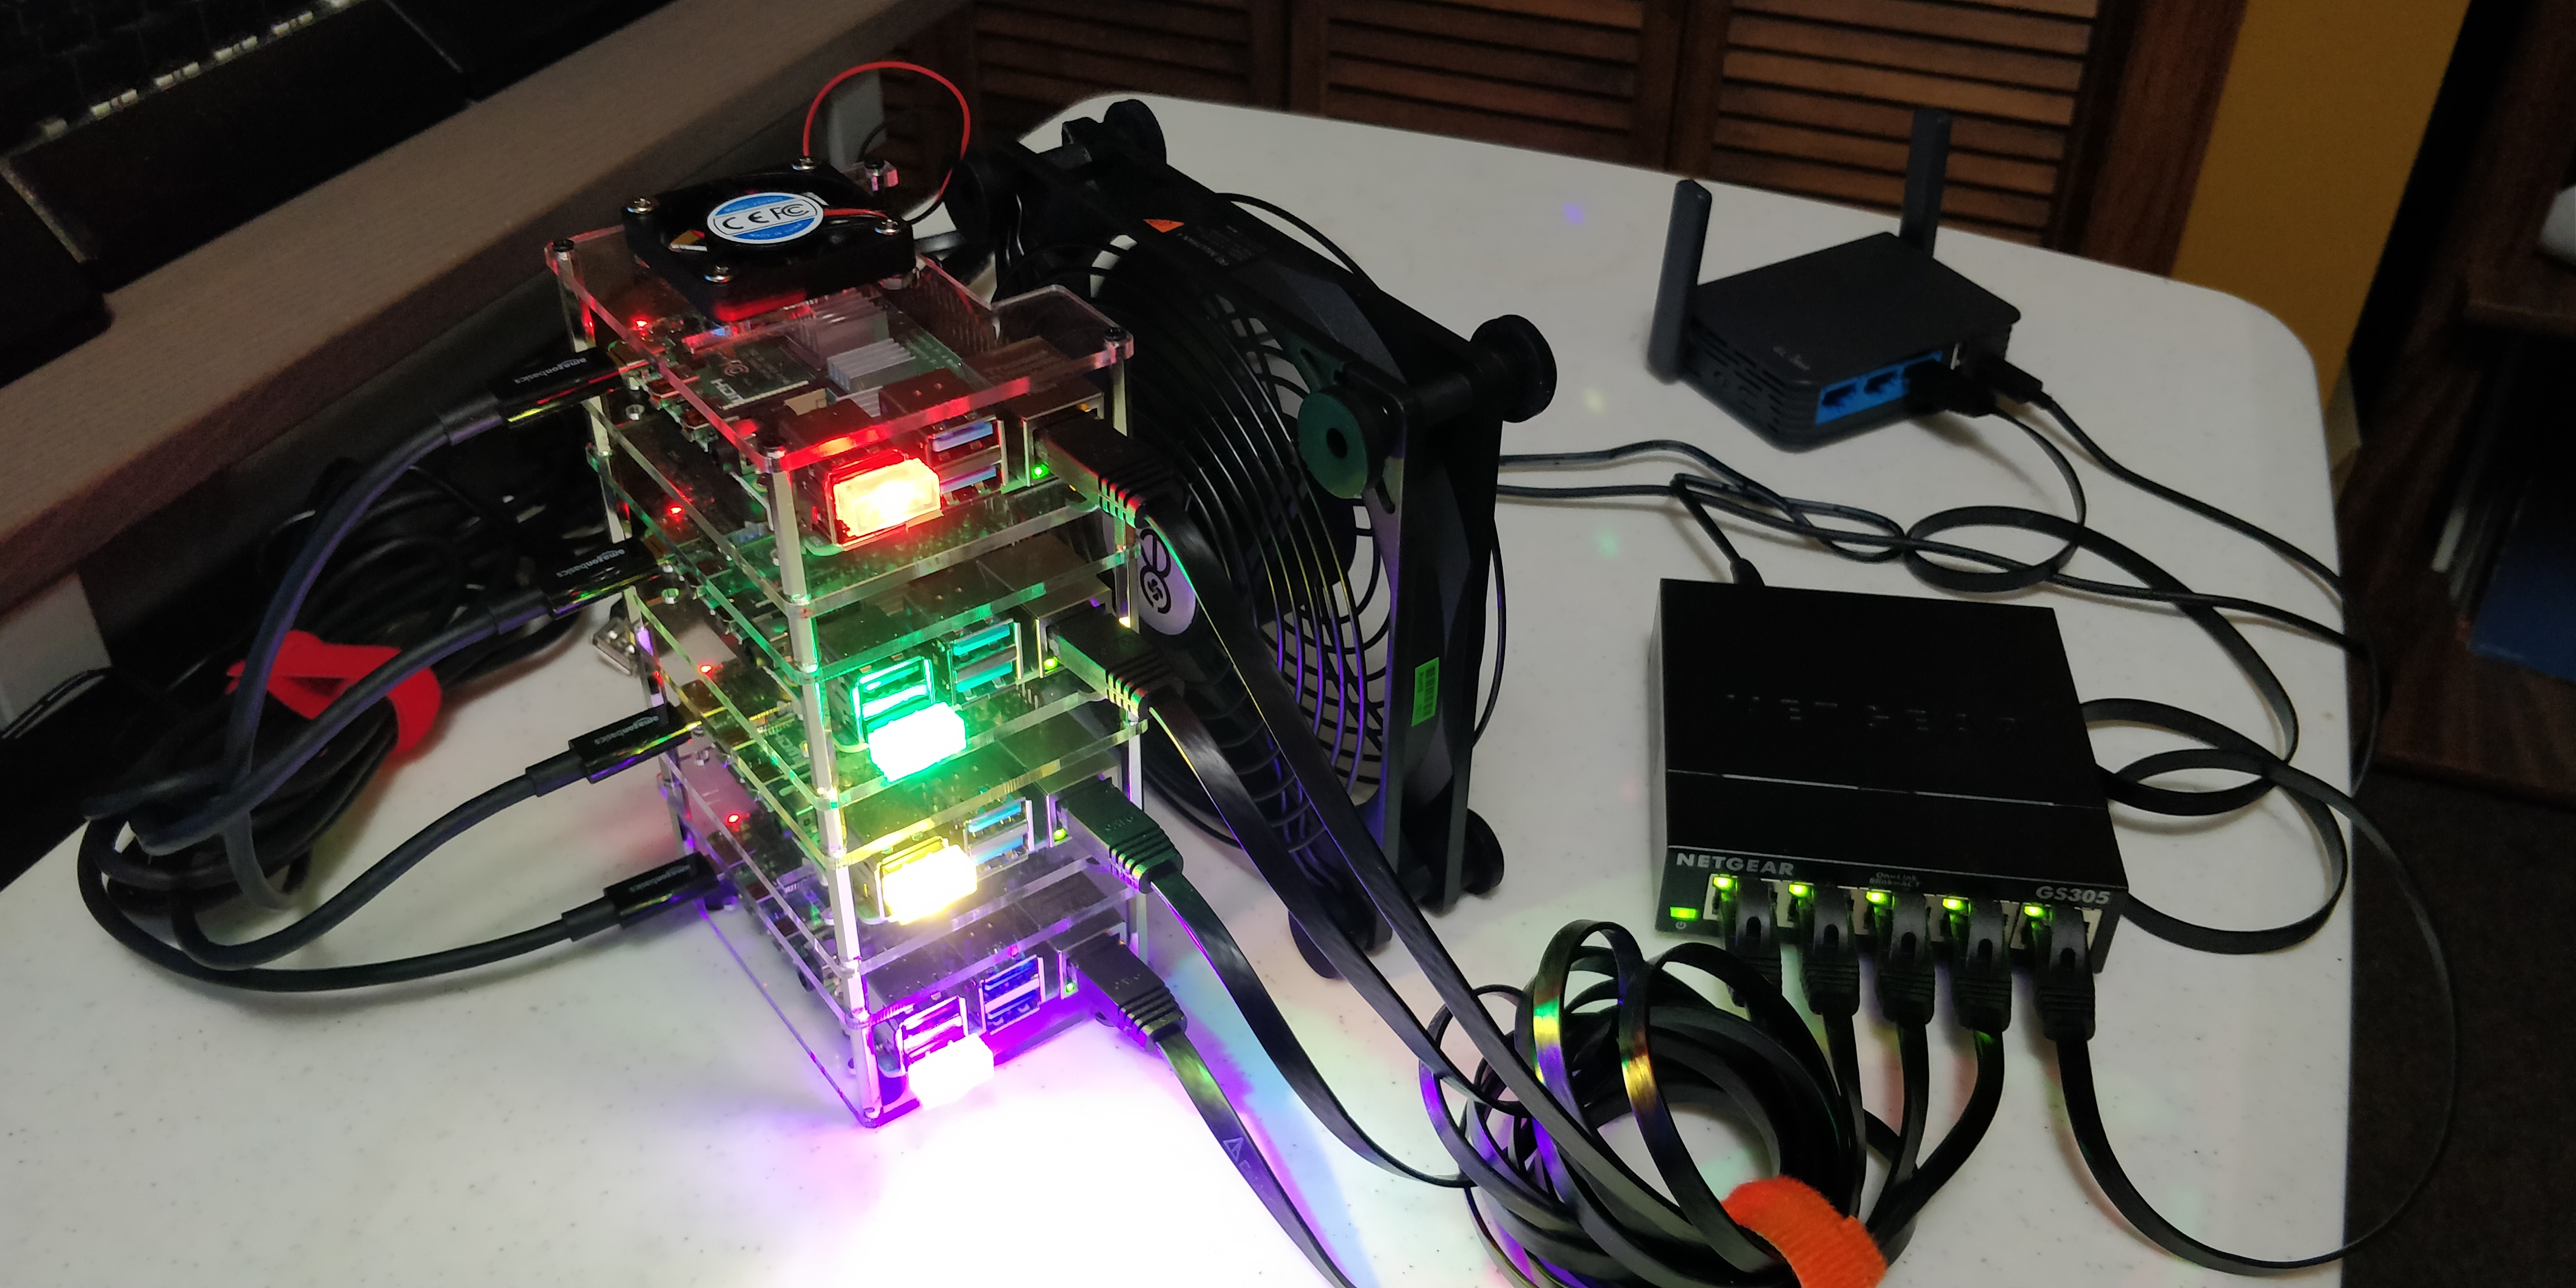
Here are the basic components:
- 4 base Raspberry Pi 4 4gb computers - similar to this
- Raspberry Pi 4 stack case - similar to this
- External case fan - similar to this
- 4 32gb SD cards - similar to this
- 5 port network switch - similar to this
- 6 port USB power hub - similar to this
- 5 short network cables - similar to this
- 4 short USB 3 power cables - similar to this
You don’t necessarily need to buy the exact items shown here, but similar. In particular, there is now an 8gb Raspberry Pi version you might like, and you might want bigger SD cards for more storage. Also, I recommend against getting a stack case with built-in fans, as the one I got was way too loud, so I got the quieter external case fan instead.
Networking
The photo also shows a portable travel router, which is 100% optional. I travel a lot to speak at conferences and to various client sites, and having a consistent network environment for the cluster is very important.
I carry a GL.iNet device similar to this. It allows me to host my own wifi network on top of an existing wired or wireless network, so my Pi cluster always talks to the same router, same subnet, and so forth.
However, since the pandemic I haven’t been traveling, so I now have my cluster connected to my regular office network and don’t use the travel router at all.
⚠ Your key takeaway should be that each device in the cluster should always have the same IP address in the same subnet, otherwise things get very complex. Kubernetes doesn’t deal well with big infrastructure changes like that.
Lights and Accessories
In the photo you might also notice that each Pi device has a bright colorful light. This is purely for fun, and for stage effects (remember I used to carry this to speak at events). The lights I used are similar to this.
You can envision all sorts of USB-based lights and accessories to play with if you’d like, I generally don’t have the lights connected in my office because they are too distracting.
Assembly
The assembly is fairly straightforward, and I’ll just outline the steps.
- Attach the heat sinks to each Pi board
- Attach each Pi board to a platform of the stacking case
- Assemble the stacking case
- Connect a network cable from each Pi to the switch
- Connect a network cable from your office/home network to the switch
- Connect a power cable to each Pi, but don’t connect to the USB power block yet
- Connect the USB fan to the USB power block and have it blow across the devices (they will get hot otherwise)
You can now power up the network switch and USB power block. At this point you should see your office/home network connection to the switch, and the external case fan should be running.
Installing Linux
You’ll note that I didn’t have you insert the SD cards or power up any Pi devices yet. That’s because it is necessary to install the Linux OS onto the SD cards first.
Initially I tried using the Raspbian Linux distro, now called Raspberry Pi OS. And this might work now, but last year when I put my cluster together there was no fully 64 bit version of Linux available. In particular, it is necessary to have a 64 bit user space where Kubernetes will run.
So instead I installed Ubuntu Server for ARM. Ubuntu provides docs on how to install the OS on a Raspberry Pi 4.
This page includes the specific download link for 64 bit Ubuntu that will run on Raspberry Pi 4 devices. Use a PC or Mac to download that image.
With the image available, follow the tutorial provided by the Ubuntu page, except ignore step 5; There is no need to install a desktop on the server.
Once you have the SD card set up, put it in one of your Pi devices and plug the USB power cord from that device into the USB power block. That’ll boot the Pi device, and you should be able to use ssh to connect to the device as described in the tutorial.
ℹ I have found that WSL (Windows Subsystem for Linux) or the Git Bash shell are good tools to use from Windows to
sshinto other Linux devices.
I recommend changing the device name, IP address, and installing all updates.
Setting the Device Name
Changing the device hostname requires editing the /etc/hostname file.
sudo nano /etc/hostname
This file contains a single line of text, which is the name of the device.
I chose to name my devices pi01, pi02, etc.
Using a Static IP
To set up a static IP, follow the server instructions to set up a static IP.
⚠ Make sure to use an IP address in the range of your DHCP server, and one that is not currently used by any other devices on your network.
Installing Linux Updates
While connected to the Pi device, run the following commands:
sudo apt update
sudo apt upgrade -y
This will update all the components of Linux to the latest versions.
Repeat Per Device
Repeat these steps for each of your Raspberry Pi devices. Each should end up with a unique name and static IP address, and they should all have the latest Linux updates.
Installing Kubernetes
I am running microk8s on my cluster.
Install Prep
There are specific instructions for installing microk8s on Raspberry Pi.
⚠ These instructions may incorrect when using Ubuntu server!
This article about enabling memory cgroup in Ubuntu 20.04 may be helpful.
When I installed Ubuntu, I installed 19.04, and instead of editing the cmdline.txt file, I needed to edit the /boot/firmward/nobtcmd.txt file.
sudo nano /boot/firmware/nobtcmd.txt
This file’s contents should end up like this:
cgroup_enable=cpuset cgroup_enable=memory cgroup_memory=1 net.ifnames=0 dwc_otg.lpm_enable=0 console=ttyAMA0,115200 console=tty1 root=LABEL=writable rootfstype=ext4 elevator=deadline rootwait
The important parts for microk8s are cgroup_enable=cpuset cgroup_enable=memory cgroup_memory=1. The remainder of the contents should have already been in the original file.
Apparently in 20.04 it is necessary to edit cmdline.txt instead of nobtcmd.txt, but I upgraded to 20.04 and my config remains in nobtcmd.txt and my cluster continues to work fine. So perhaps a fresh install of 20.04 works differently from an upgrade?
Install microk8s
With the memory cgroup prep done, you can follow the standard microk8s install instructions.
⚠ Install on your primary backbone node first
At the bottom of the first docs page is a link to setting up a cluster. Follow those instructions to install and configure microk8s on each of the worker nodes.
Once you have all the nodes active, you can run microk8s kubectl get nodes on the backbone node:
ubuntu@pi01:~$ microk8s kubectl get nodes
NAME     STATUS   ROLES    AGE   VERSION
pi01     Ready    <none>   49d   v1.19.0-34+ccff43092fa44b
pi02     Ready    <none>   49d   v1.19.0-34+ccff43092fa44b
pi03     Ready    <none>   49d   v1.19.0-34+ccff43092fa44b
pi04     Ready    <none>   49d   v1.19.0-34+ccff43092fa44b
The result should be similar to what I’ve shown here.
Enabling Cluster Services
As part of the standard install instructions, you will have enabled dns and storage services on the cluster.
microk8s enable dns storage
In my cluster I have other services enabled as well, and I find these make the cluster a lot more useful. The services I have enabled are:
- dashboard - provide access to the standard Kubernetes dashboard
- dns - provide DNS to pods inside the cluster
- helm3 - support helm 3 installations in the cluster
- metallb - load balancer so services have an IP address
- metrics-server - collect metrics about the cluster
- registry - a private container registry hosted in the cluster
- storage - support persistent storage of data for things like databases
You may choose to enable or disable these or the other services available. This is your cluster after all!
At this point you have a functioning Kubernetes cluster into which you can install any containers that support the arm64 architecture.
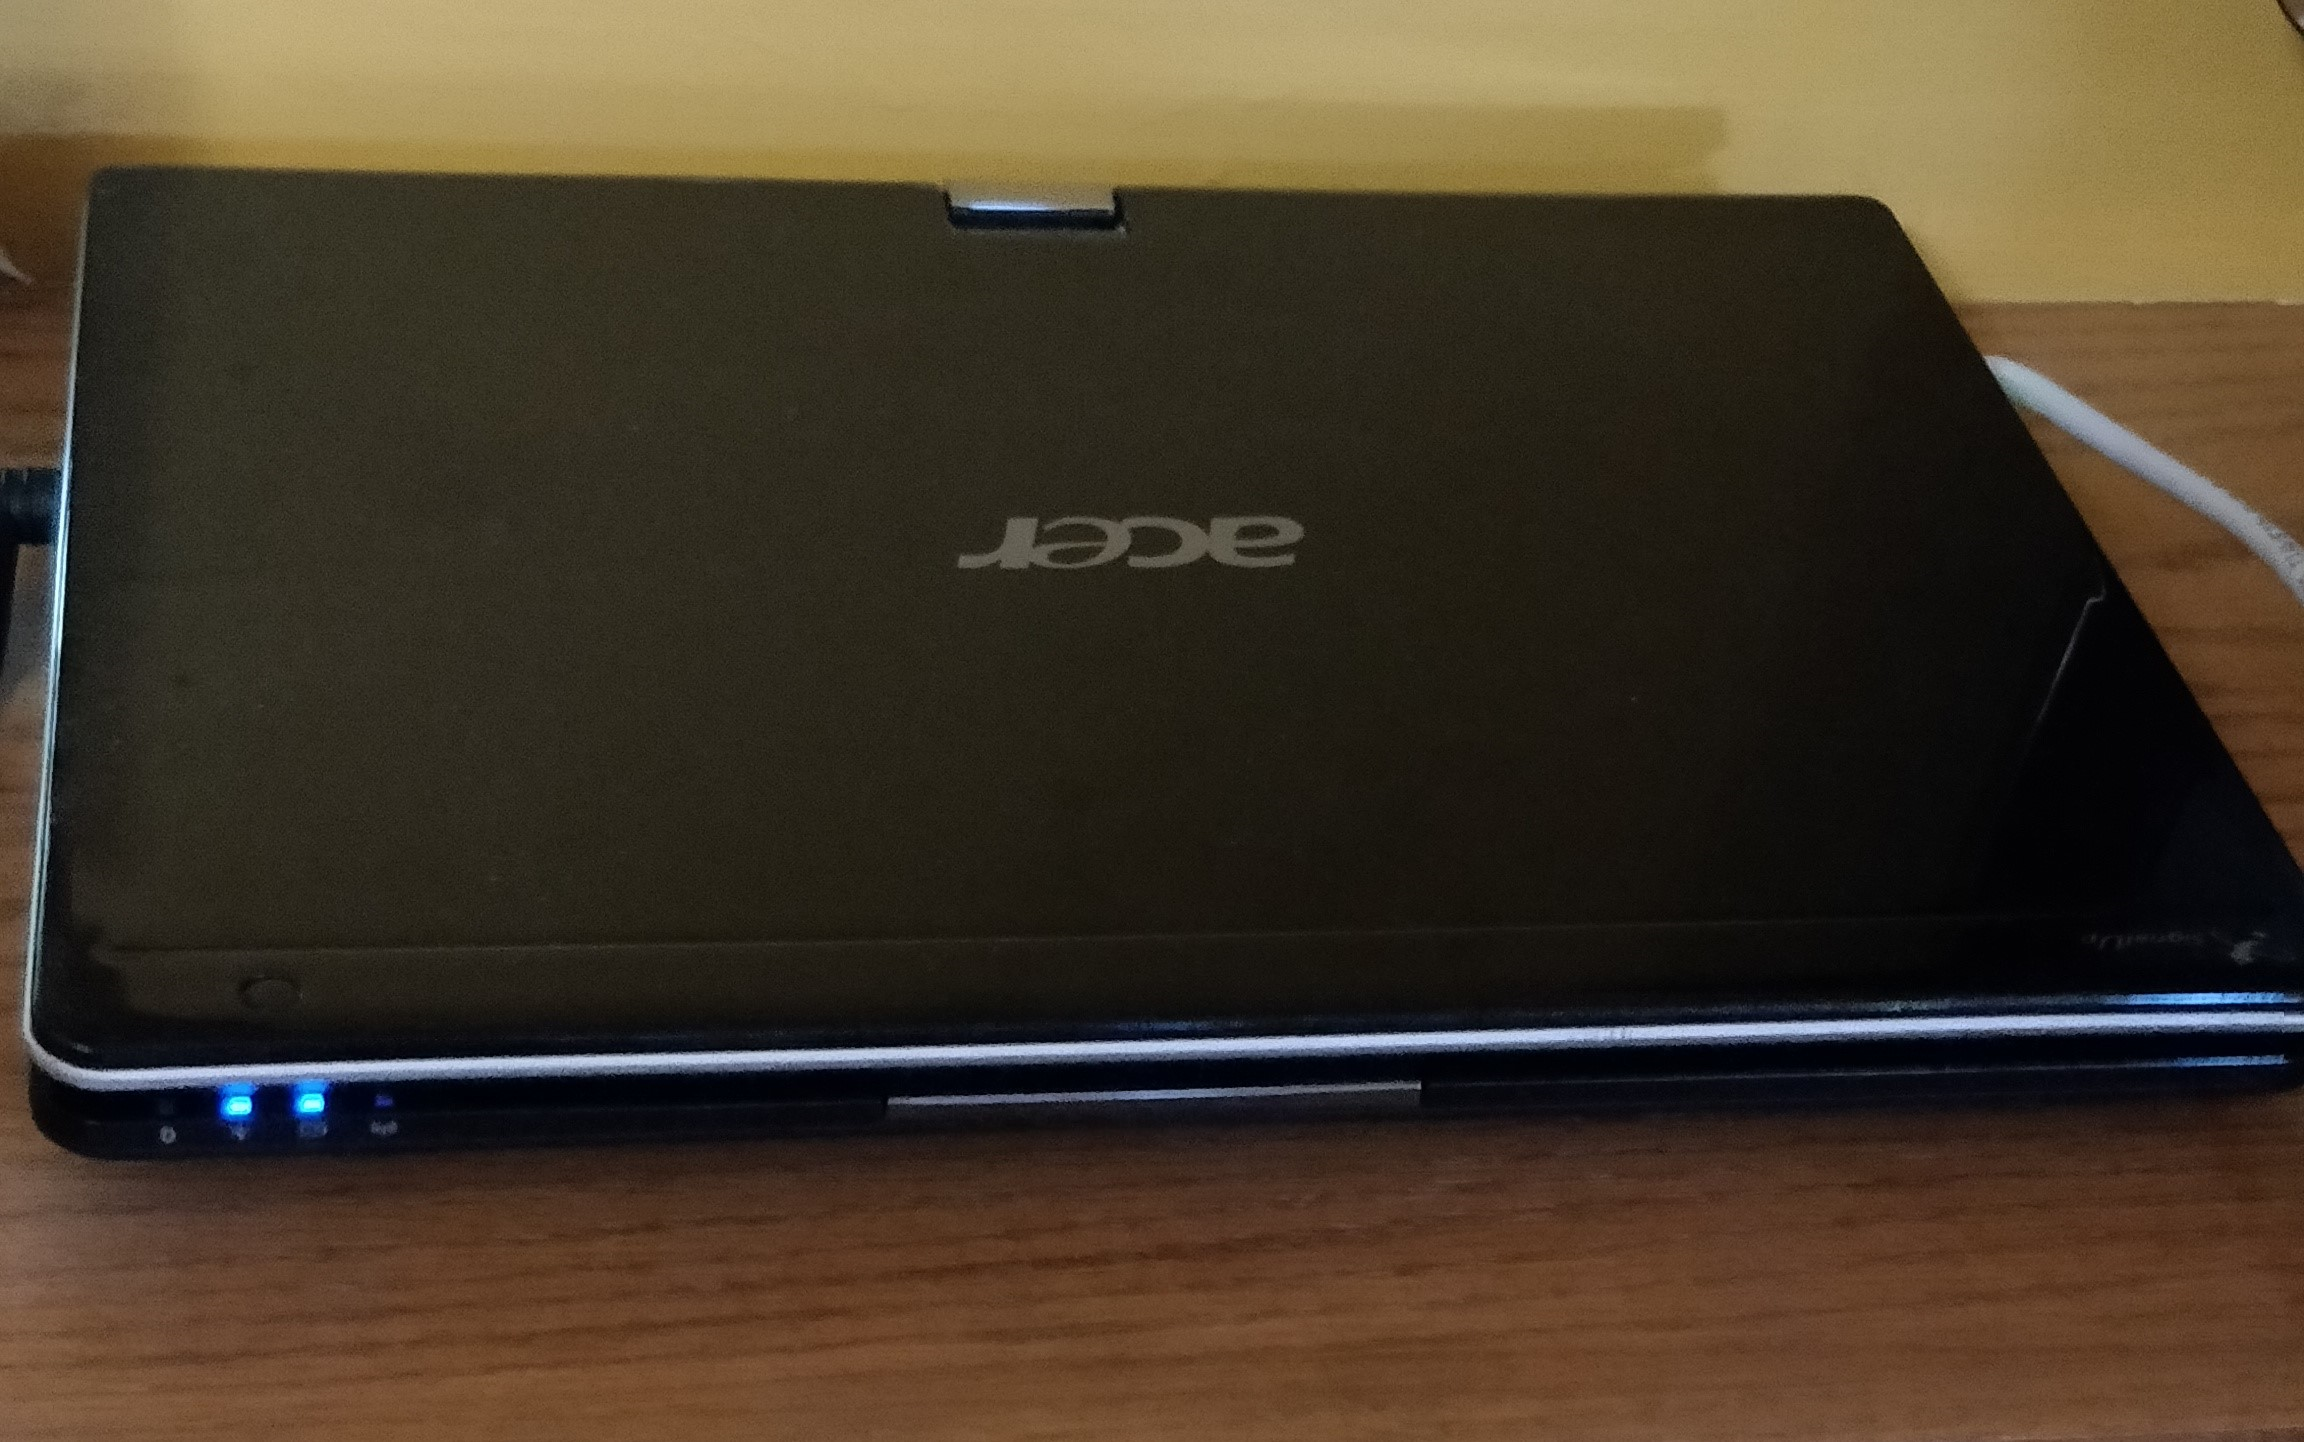
Adding an amd64 Node
I have found that there are too many useful containers available that do not support the arm64 architecture. As a result, I added an amd64 (Intel x64) node to my cluster.
This node is an old laptop from 2007, one of the first available with Windows 7 I think. But it has 4 gb of RAM, and that’s enough to run Ubuntu server and microk8s, just like the 4 gb Pi devices.
I did the following:
- Install Ubuntu server on the laptop using a USB thumb drive, wiping the hard drive and replacing Windows with Linux
- Changed the hostname to
acer01 - Installed microk8s on the device, and added it as a worker node
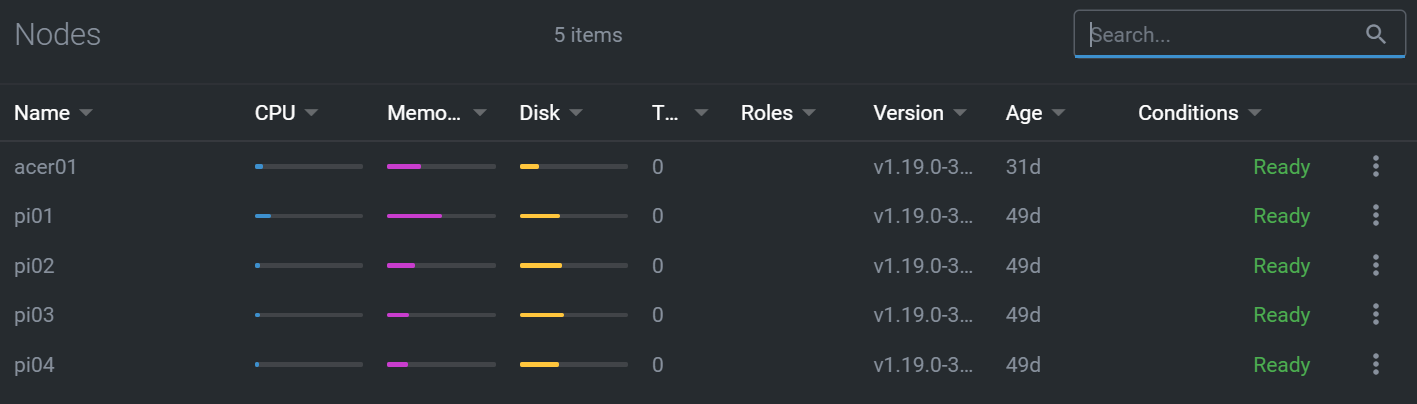
My cluster now has 5 nodes.
NAME     STATUS   ROLES    AGE   VERSION
acer01   Ready    <none>   30d   v1.19.0-34+1a52fbf0753680
pi01     Ready    <none>   49d   v1.19.0-34+ccff43092fa44b
pi02     Ready    <none>   49d   v1.19.0-34+ccff43092fa44b
pi03     Ready    <none>   49d   v1.19.0-34+ccff43092fa44b
pi04     Ready    <none>   49d   v1.19.0-34+ccff43092fa44b
I still run as much as possible on the arm64 Pi nodes, but when necessary I can now run containers on an amd64 node too.
Specifying Container Architecture Constraints
I have found that very few Kubernetes deployment yaml files, nor helm charts, bother to specify the necessary architecture constraints. This is frustrating, because without those constraints in the deployment or chart yaml, the cluster often tries to deploy a container to a node that doesn’t have the correct hardware architecture.
In a deployment yaml file it is necessary to include a nodeselector element. For example, here’s my modified deploy.yaml file for Microsoft SQL Server:
apiVersion: apps/v1
kind: Deployment
metadata:
  name: mssql-deployment
spec:
  replicas: 1
  selector:
     matchLabels:
       app: mssql
  template:
    metadata:
      labels:
        app: mssql
    spec:
      terminationGracePeriodSeconds: 10
      initContainers:
      - name: volume-permissions
        image: busybox
        command: ["sh", "-c", "chown -R 10001:0 /var/opt/mssql"]
        volumeMounts:
        - mountPath: "/var/opt/mssql"
          name: mssqldb
      containers:
      - name: mssql
        image: mcr.microsoft.com/mssql/server:2019-CU5-ubuntu-18.04
        ports:
        - containerPort: 1433
        env:
        - name: MSSQL_PID
          value: "Developer"
        - name: ACCEPT_EULA
          value: "Y"
        - name: SA_PASSWORD
          valueFrom:
            secretKeyRef:
              name: mssql
              key: SA_PASSWORD
        volumeMounts:
        - name: mssqldb
          mountPath: /var/opt/mssql
      volumes:
      - name: mssqldb
        persistentVolumeClaim:
          claimName: mssql-data
      nodeSelector:
        kubernetes.io/arch: amd64
Notice the way the amd64 architecture is required:
      nodeSelector:
        kubernetes.io/arch: amd64
Given that most deployment files don’t include this selector, you should expect to add it in most cases; specifying either amd64 or arm64 as appropriate.
The nodeselector element can include multiple requirements. These can include:
kubernetes.io/arch(arm64,amd64, etc.)kubernetes.io/hostnamekubernetes.io/os(linux,windows, etc.)
Using Lens
I have found Kuberentes Lens to be a very useful GUI for working with Kubernetes clusters.
ℹ In fact, it was Lens that got me to add the amd64 node initially, because I wanted to use the dashboard features of Lens, and one component only works on amd64.
Dashboard Views
Lens provides a number of useful features when working with Kubernetes. I’m sure all of these features (and more) are available via kubectl and other command line tools, but I find the GUI to be quite productive.
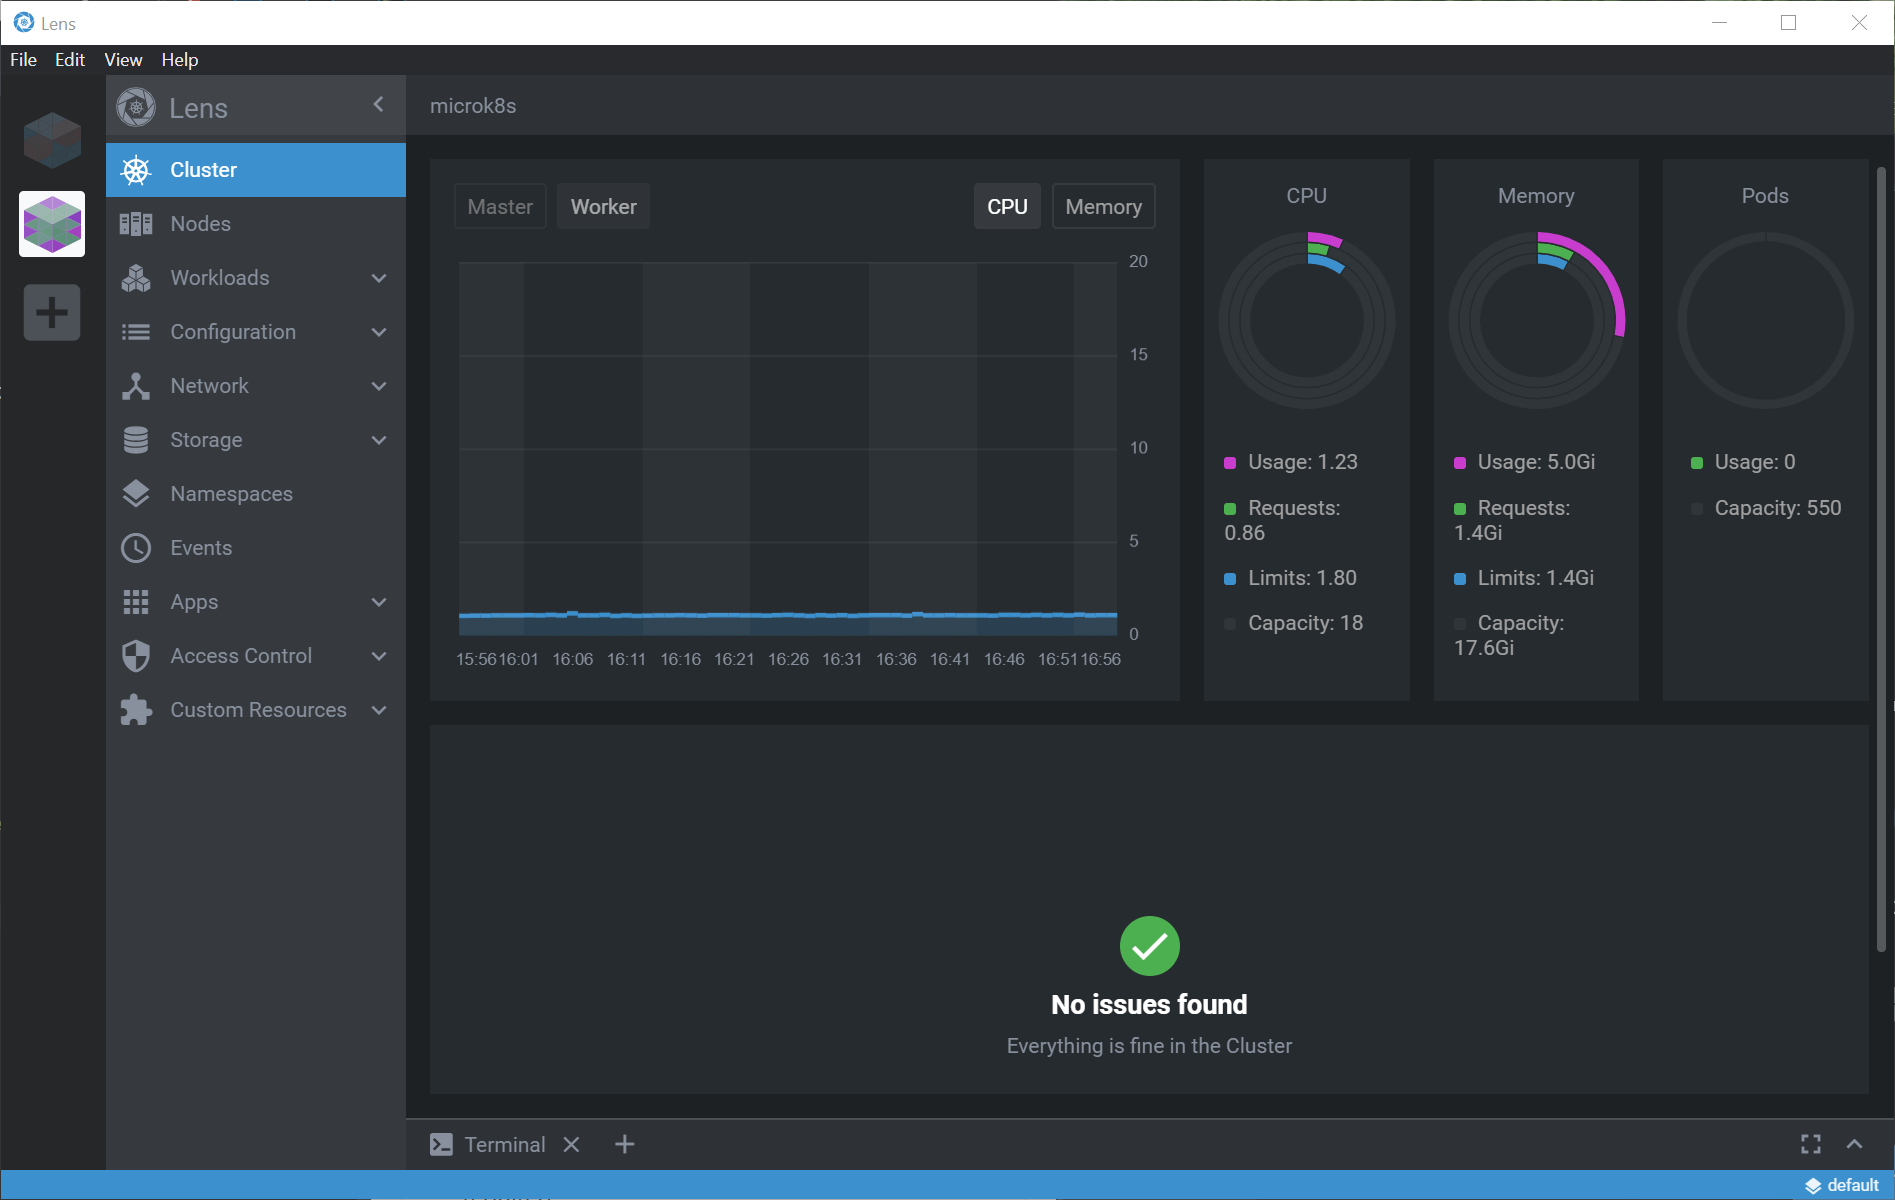
For example, here’s the top-level view of my cluster.
And here’s a list of the nodes.
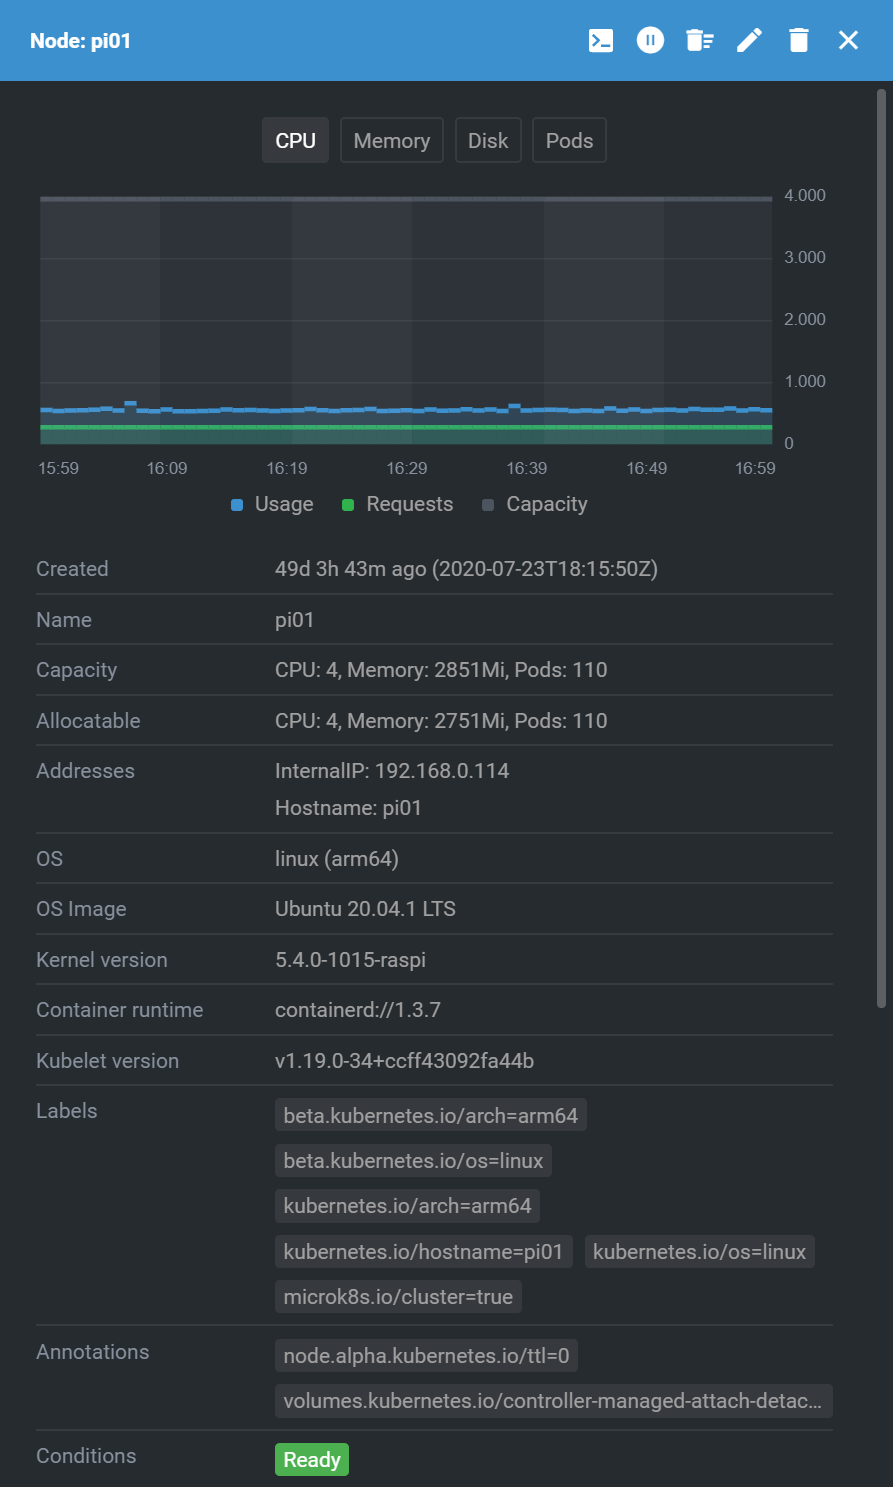
Looking at a specific node, here’s part of the available information.
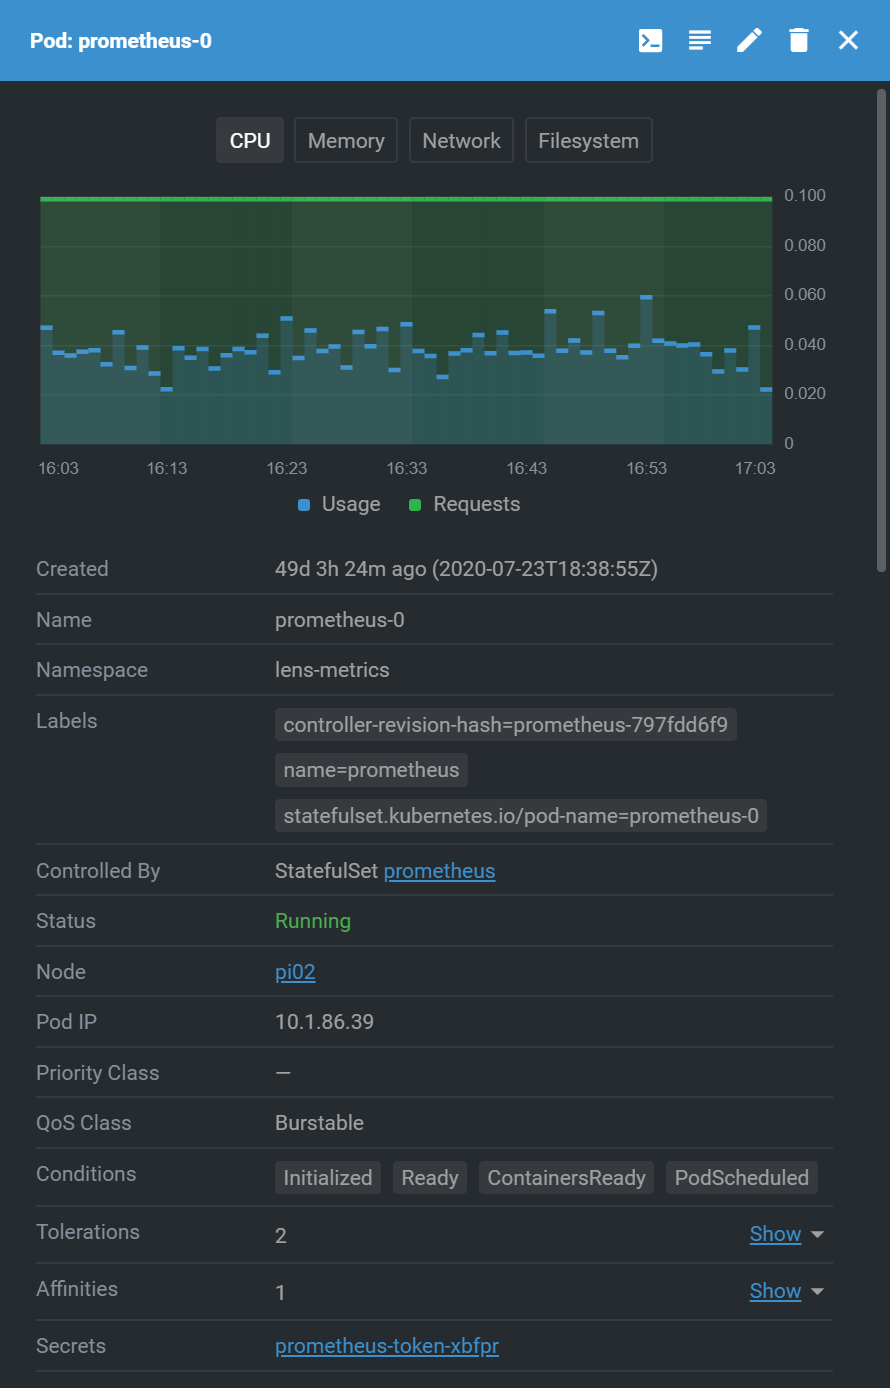
In the Workloads tab there’s a list of running deployments (pods), and clicking on a pod gives details about that workload.
There are many other views available, with a lot of detail on nearly every aspect of a cluster.
Enabling Metrics
The most important step to make Lens truly useful as a dashboard and monitoring tool is to enable metrics on the cluster. This is done by right-clicking the cluster icon on the far left and choosing Settings.
In the settings it is possible to just click a button to enable metrics.
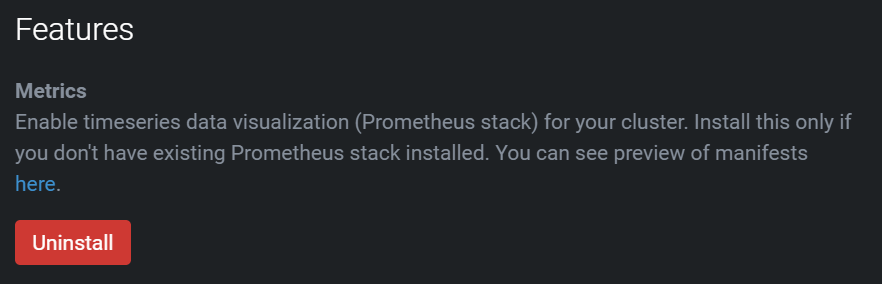
In this case, I’ve already enable metrics.
⚠ This requires at least one amd64 node in your cluster to run the metrics collection container.
Once metrics are enabled, Lens will start to show consumption of CPU, memory, and storage space for the cluster, as well as each node and pod.
Conclusion
Months ago I started down this road of exploring Kubernetes, and I wanted a way to build a cluster that was affordable and reasonably powerful.
This cluster costed less than US$400 when I built it. Setting up the hardware took just an evening. Compared to a typical US$150-$200/month cost for Kubernetes on Azure (AKS), I’ve paid for this cluster many times over!
Figuring out the combination of Linux OS and Kubernetes package took a lot longer, with lots of trials, failures, and finally success with Ubuntu server and microk8s.
Adding an amd64 node unlocked a lot of important capabilities that just aren’t available with arm64 only. Too many containers just don’t have an arm64 deployment available. Yet having a mixed architecture cluster means nodeselector becomes very important, and too few yaml files include that important constraint.
Kubernetes is amazingly powerful, but remains somewhat immature in terms of installation and management. Microk8s and Lens do help address that immaturity pretty well.
The Kubernetes ecosystem overall, deploy files and Helm charts, are also immature, but they continue to improve steadily.
I’m really enjoying my private, low-cost, and very functional Kubernetes cluster. I hope this blog post helps you get started as well.